This weekend I am heading to Las Vegas and I wanted to have a couple of kick-ass crocheted pieces to take along. I chose the Toshiko Popover and the All Shawl, both Doris Chan creations. I made the Popover in naturallycaron.com Spa, and the All Shawl in Red Heart Soft. They are rockin'! The All Shawl, though, is waaaay too short for my liking. I even added two extra rows but the inevitability is staring me in the face: I am going to have to block it.
Um, I've never blocked a thing in my life. Working with acrylic, I don't really find the need. Plus, it scares me. But this shawl is a thing of beauty and I am all about new challenges, so why not give it a go? Did a bit of research and it seems peoples views on blocking acrylic are all over the map. Wet block, steam block, don't block. What's a gal to think? This is when the science geek in me takes over. On to my experiment...
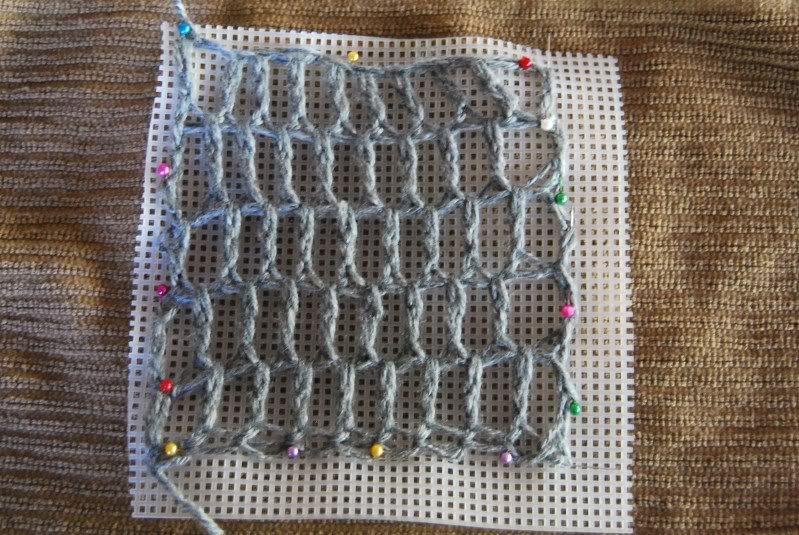
I made three swatches in Red Heart Soft. I used edc (extended double crochet) since that's the stitch used in the All Shawl. I made them 4"X4". One was a control swatch, and would remain in its original state throughout the experiment. One swatch was to be wet blocked, and one was to be steam blocked. I don't have blocking boards or push pins, so I made do with what I have. I used plastic canvas sheets and sewing pins. Seems to have worked just fine!
All three swatches...

Sizing...

Wet Blocking
For this swatch, I just soaked the swatch and rung out the water as much as possible. Then I pinned in place and waited. It took 5 hours to dry!
Wet blocking on the plastic canvas...

Steam Blocking
For this swatch, I pinned in place and held my iron about 1 - 2" above the swatch. I kept blasting it with steam for about 2 or 3 minutes then left it to cool...which didn't take long.
Steam blocking on the plastic canvas...

After blocking, both swatches were the same size, as expected.
All three swatches ready for the washer...

But remember, this household is all about the washable benefits of acrylic. So, which method would retain its shape after being thrown in the washer/dryer? The results are quite clear. Although the steam blocked piece lost a bit of height, it's the obvious winner. In fact, I couldn't tell which swatch was original and which was wet blocked. Should have put a little contrasting yarn on that one too, but it really wouldn't have helped, since it ended up the same size as the original.
All three swatches, post washer/dryer...

Hope you enjoyed the results of my experiment as much as I did. Guess a handheld steamer is in my future as I REALLY need to block my shawl. Once I do, I will add pics!
i also pretty much use acylic for everything and was wondering about blocking so thanks heaps for this post!!!
ReplyDeleteI use acrylics too for a number of reasons. Cost is a big factor, plus I am allergic to wool so don't like working with it at all, I get big hives and itch like crazy. Wash and wear is important to me too. I had never blocked anything so was quite interested in your experiment and really enjoyed reading your post of your results!
ReplyDeleteAlso, I really liked your idea of using the plastic canvas to block your swatch. Did you find that the PC curled or distorted from the steam heat or was that not an issue? Just wondering.
ReplyDeleteEmerson- glad you enjoyed this experiment!
ReplyDeleteSusie- yes the plastic canvas did warp a bit from the heat of the steam. Its probably not the best form for blocking but that was all I had to work with. However, the warping didn't seem to affect the blocking measurements. And I too use acrylics due to money sometimes. There are some unbelievable beautiful woolens that I just couldn't afford to work with, even if I wanted to.
I am all for improvising to make do. Awhile back I was on a crochet thread snowflake binge and needed to starch and block them. Just couldn't justify purchasing a blocking pad so I just cut about 6 pieces of an old cardboard box the same size, taped them together, then covered that with waxed paper. Worked like a charm! Amazing what you can do without all the fancy doodads, lol.
ReplyDeleteThank you SO much!!! I just finished a piece that really needs blocking, which I've never done, and I was totally clueless about how to do it. I've never used the steam feature on my iron before; guess it's time to learn...
ReplyDeleteGreat post, I had to tweet it!
ReplyDeleteI would never have thought of steam blocking but it makes total sense! The heat basically melts the acrylic a bit, you stretch it on the blocking pins and when it cools (re-solidifies) it stays in the new shape. Since you've sort of "re-molded" the plastic-y bits they should stay that way after washing.
ReplyDeleteNow I have a Simply Soft Paints project to get to that I didn't think would work because I couldn't block it :-)
Great science experiment! And jeani's explanation of the physics behind it makes sense. When I block, I use ceiling tiles from the home improvement store--they often have them on sale if a corner has been knocked off. You can fit them together to make a blocking board as big as your available floor or table space. I'll have to try this on an afghan I'm crocheting.
ReplyDeleteCeiling tiles! What a great idea! Thanks for sharing.
Delete